The Whole Knit & Caboodle

Barely coherent ramblings of a yarn-obsessed stay at home mom

Design Wars and FREE Pattern Release!

Hello friends!  I’m sorry it has been so long since my last post, things have been hectic around here because of the holidays (Christmas is my busiest time for orders and this year was no different) I’ve had little time for anything but crocheting and sleeping.  OK.  That’s a lie.  I got some very nice time in with my family- my daughter turned 3 at the end of November so I can easily say that this was the most magical Christmas of my adult life so far.

I received some amazing news around the same time- The application I submitted to be a challenger in the Design Wars Challenge was accepted!  I’m SO excited!  I’ll be going head to head with some of my crochet idols in this challenge, I hope I can keep up!  For those of you who aren’t familiar with the challenge, it was founded by Salena Baca of Baca Creations and is sponsored by Red Heart Yarns.  A yarn is chosen for the challengers to work with and they each come up with a new, original design.  Once the designs are completed and revealed, the public gets to vote on their favourites in a number of different categories.  There is a lot of fun to be had and there are even prizes to be won!  There is SO much amazing talent in this round, I hope you’ll check it all out!  For more information about this elite crochet challenge, please visit http://www.designwarschallenge.com.

While I’m waiting for my Design Wars yarn to arrive, I decided to get the ol’ pattern-writer primed up.  What I came up with is possibly the fastest, easiest, one skein cowl you’ll ever make.  I made mine with a skein of Loops & Threads Charisma and it took me less than an hour.  Available for FREE on Craftsy and Ravelry for, I hope you’ll rush over and download a copy!  If you make one up, let me know what you think!
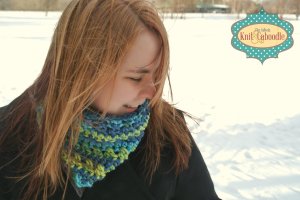
Thank-you to my beautiful friend Jenelle for modelling! :)

Thank-you to my beautiful friend Jenelle for modelling! 🙂


7 Comments »

Free Cupcake Pin Cushion Pattern

What are your bad crafting habits?  Do you leave  yarn tails all over?  Do you start a project only to abandon it when you find something new and exciting to work on?  I’m not going to confess all my crafting sins but one of my biggest (and most hated by my husband) is that I stick pins in the arm of the couch.

Yesterday I decided to change this.  Here’s my solution:

Cupcake Pin Cushion Bracelet

Cupcake Pin Cushion Bracelet

While I don’t see the cupcake bracelet catching on as a fashion accessory anytime soon, it’s perfect for keeping pins close at hand at wrist when you’re sewing or assembling a knitting/crochet project.

This is a great project to use up leftover yarn and it works up very quickly.

Here’s what you’ll need: 

A size F5/3.75mm hook

Approx. 8 yds of worsted weight yarn in your choice of colour for the “”frosting”.

Approx. 4 yds of worsted weight yarn in your choice of colour for the cupcake bottom.

Approx. 6 yds of worsted weight yarn in your choice of colour for the bracelet.

A 3/4″ button

Yarn needle for weaving in ends

A small amount of polyester stuffing.

Gauge isn’t terribly important.  Using a F5/3.75mm hook I ended up with a cupcake that is about 2 1/4″ wide and 1 1/2″ high.

Cupcake:

Rnd 1: Using frosting colour, make a magic circle.  Ch 1.  Work 6 sc in circle, pull tail to close circle tightly.  (6)

Rnd 2: Work 2 sc in each st around.  (12)

Rnd 3: *Sc in next st, 2 sc in next* repeat ** around.  (18)

Rnd 4: *Sc in next 2 sts, 2 sc in next* repeat ** around.  (24)

Rnds 5 & 6: Sc in each st around.  (24)

Rnd 6: Ss in each st around.  (24)

Rnd 7: (For each st of this rnd you will be inserting your hook up under both loops of the slip stitches from the previous rnd, NOT the single crochets into which you worked your slip stitches.) *2 sc in next st, ss in next* repeat ** around.  Finish off, weave in end. (24 sc, 12 ss)

Rnd 8: Join cupcake bottom colour in any of the sc stitches from rnd 6.  Ch 1 (counts as a sc).  Sc in each st around.  (24)

Rnd 9: Sc in each st around.  (24)

Rnd 10: *Sc in next 2 sts, sc 2 tog* repeat ** around.  (18)

Rnd 11: (Working in back loops only)  *Sc in next st, sc 2 tog* repeat ** around. (12)

Stuff cupcake firmly.

Rnd 12: (Working in both loops).  {Sc 2 tog} x 7.  Finish off, weave in end.  (5)

Bracelet:

With bracelet colour, ch until you reach desired length.  I chained 34 and got a bracelet of about 7″.

Tr in 5th ch from hook and in each ch across.  Finish off and weave in ends.

Sew bracelet to underside of cupcake.

Before attaching the button, stitch together two of the triple crochets at one end.  This just reinforces the material beneath the button.

What I like about the bracelet is that it is adjustable- you just put the button through the spaces between the triple crochets and make it as tight or as loose as you’d like.

If you use pins with the coloured plastic ends, they look like sprinkles! 😉

I made a few cupcakes for my daughter (minus the bracelet and the pins), she loves them!  They’re great “desserts” for tea parties!

**You are welcome to make and sell items from this pattern as much as you’d like, but please don’t sell this pattern or claim it as your own.**

*Pattern updated March 4/14 to correct error in round 10*


Copyright © 2013 Sarah Horrocks

9 Comments »

Free Skull Appliqué Pattern

Whoo!!  Orders are finished until after Christmas!  I cut it pretty close and pulled an all-nighter last night (probably the first intentional all-nighter since my University days) and powered through most of the remaining orders I had.  The last stitches were sewn this afternoon.  Phew!

Two of the orders I had were for hats that were Monster High themed.  I’ve seen commercials for the dolls but I don’t know if there’s a show about them or if they’re just a line of toys.  They seem to be really popular- even my 4-year old niece was asking for “Monster Barbies” last year for Christmas.

It took me a couple of tries but I finally came up with a design I was happy with.  It works up quickly and I thought it would be a nice “first free pattern” here on my blog.  If you have any issues with/questions about the pattern, please feel free to shoot me an email at thewholeknitandcaboodle@hotmail.com

Please excuse the poor artificial lighting :S

Please excuse the poor artificial lighting :S


Materials Needed: 

Small amounts of white and black worsted weight yarn

Ribbon/yarn in your choice of colour for accents (if desired)

Gauge:  Not terribly important.  With a F/3.75mm hook, my appliqué measures approx. 3″ x 2.75″

With an F/3.75mm hook and white yarn, chain 4.

Sc in second chain from hook.  Sc in each of the next two chains.  Finish off (I’m sure there’s a better way of doing this but because I’m running on no sleep and my brain has gone to mush from all of the orders I’ve been working on I can’t think of one right now).  This is the skull’s “chin”

With a new strand of yarn, chain 3.  Picking up the “chin”, work 2 sc in the stitch you worked before fastening off (joining in this stitch will allow you to use one of the ends to secure the gap that is caused by joining the two pieces). Sc in next st, 2 sc in last.  Chain 4, turn.

Working into the back of the chain, sc in the second ch from the hook and each st to the end of the row.  Ch 1. Turn.

Sc in first st, skip next, sc in next 7, skip next st, sc in last.  Ch 1. Turn.

sc in first st, skip next, sc in next 5, skip next st, sc in last.  Ch 1.  Turn.

2 sc in first st, sc in next 5, 2 sc in last.  Ch 1.  Turn.

2 sc in first st, sc in next 7, 2 sc in last.  Ch 1.  Turn.

2 sc in first st, sc in next 9, 2 sc in last.  Ch 1.  Turn.

Sc even.  Ch 1.  Turn.

Sc in first st, sk next st, sc in next 9, sk next, sc in last.  Ch 1.  Turn.

Sc in first st, sk next st, sc in next 7, sk next, sc in last.  Ch 1.  Turn.

Sc in first st, sk next st, sc in next 5, sk next, sc in last.  Ch 1.  Turn. Finish off.

Weave in ends and close gap made from joining chain with chin section.

Join black in any stitch and sc evenly around appliqué.  Finish off, leaving a long tail if attaching to a hat or other item.

Eyes (make 2):

Ch 3.  Sc in second ch from hook.  Sc in last ch.  Ch 1.  Turn.

Sc in both sts.  Finish off.

Attach eyes.  Embroider nose and add eyelashes and a bow if you’d like.

What’re you going to do with your skull(s)?  I’d love to see your FOs!

11 Comments »